
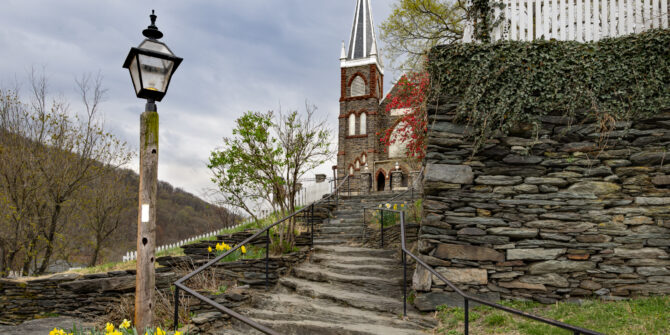
Harpers Ferry-Bolivar
Few places on the C&O Canal trail can match the drama of Harpers Ferry–Bolivar. Perched at the confluence of the Shenandoah and Potomac rivers, where the canal meets the cusp of the Appalachian Mountains, this two-town community packs centuries of American history into a compact, walkable lower town and a quieter residential hill above it.
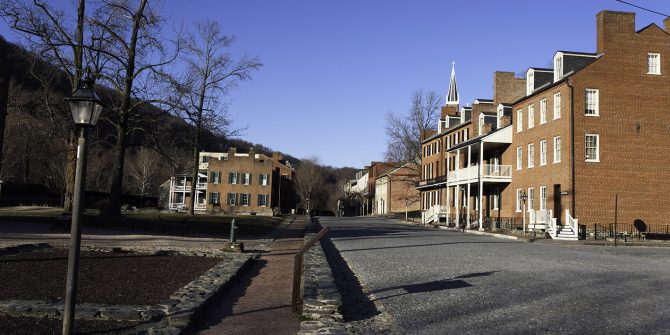
Harpers Ferry is perhaps best known as the site of abolitionist John Brown’s 1859 raid on the federal armory, an event that accelerated the nation’s march toward Civil War. During the war itself, the town changed hands multiple times, and the surrounding heights were the scene of intense fighting. Today, Harpers Ferry National Historical Park preserves much of the lower town, where the 19th century streetscape invites visitors to step into the story.
But Harpers Ferry isn’t only a history lesson. The Appalachian Trail passes directly through town. Maryland Heights and Bolivar Heights offer hiking with panoramic views of the river confluence; river outfitters run whitewater adventures on the Shenandoah and Potomac; and the restaurant and café scene along High Street and Potomac Street has grown into a real destination, a satisfying reward after a day on the towpath or trail.
Bolivar, perched just above the historic district, adds a residential character to the visit, with a pace that feels a step removed from the tourist buzz below. Together, Harpers Ferry and Bolivar make one of the most memorable stops on the entire C&O Canal corridor.

![]()
About the Canal Towns Partnership
Photos by Randy Miller, Leigh Scott, Henry Stiles